Do you find that your scenes look a little flat and boring? You’ve got your subject in a great location, framed by an excellent camera and lens, but it’s just not looking all that interesting? Good news! You may be just a couple of steps away from achieving that cinematic look you’re hoping for. What you need is a bit of contrast.
Contrast is one of your most important tools in guiding your viewer where they should look in the frame. It creates three-dimensionality and depth in your 2D image. The human brain loves contrast, as your eye is naturally drawn to where it’s strongest.
Create beautiful contrast with your lighting
Whether you’re shooting inside or outside, here are three tips to help you create cinematic contrast with your lighting, and in turn, improve your photography skills.
1. Light Upstage
What does this mean? I’m not on a stage! No, you’re not. You’re reading this on the toilet, and hopefully that’s not part of your stage!
Let’s say, for example, that you’re shooting a scene where two actors are talking to each other, having a nice conversation. Your camera is framing actor 1 in a medium-closeup shot over the left shoulder of Actor 2. Rather than placing your key light so that it’s on the camera side of Actor 1’s face (Figure 1), place it on the opposite side so that the light is illuminating the camera-opposite, or “upstage”, side of his or her face (Figure 2). This creates three-dimensionality and contrast in your scene.
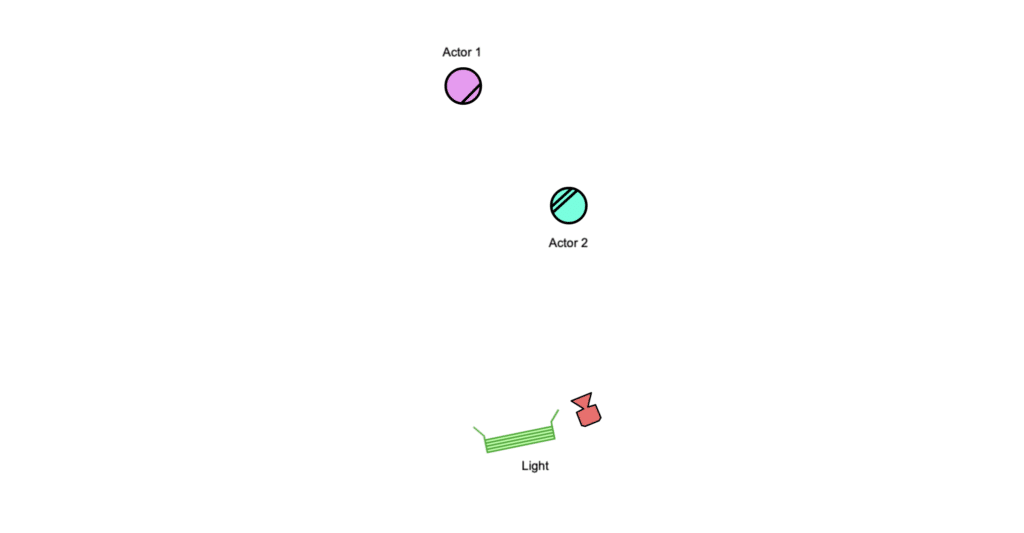
Figure 1
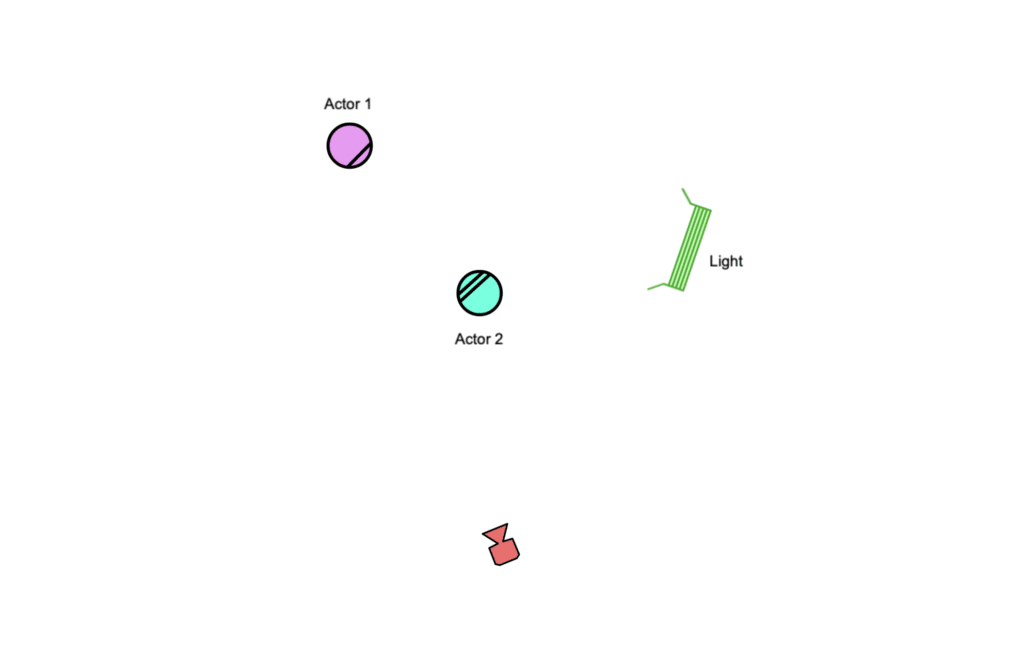
Figure 2
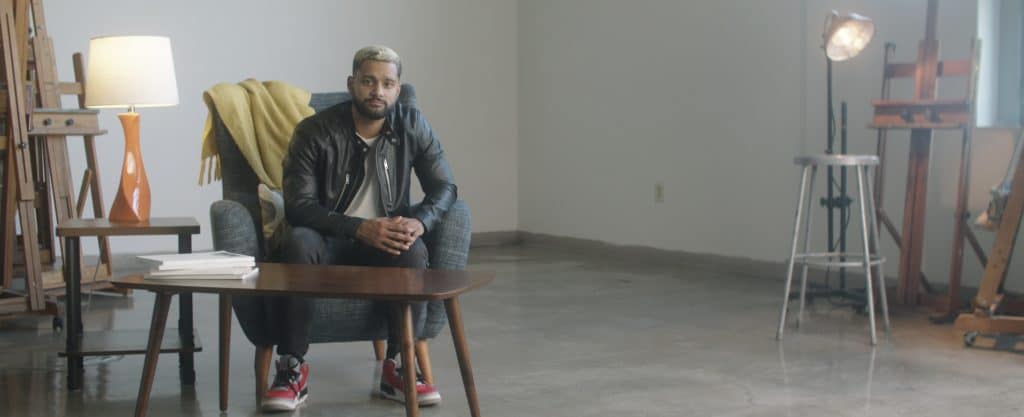
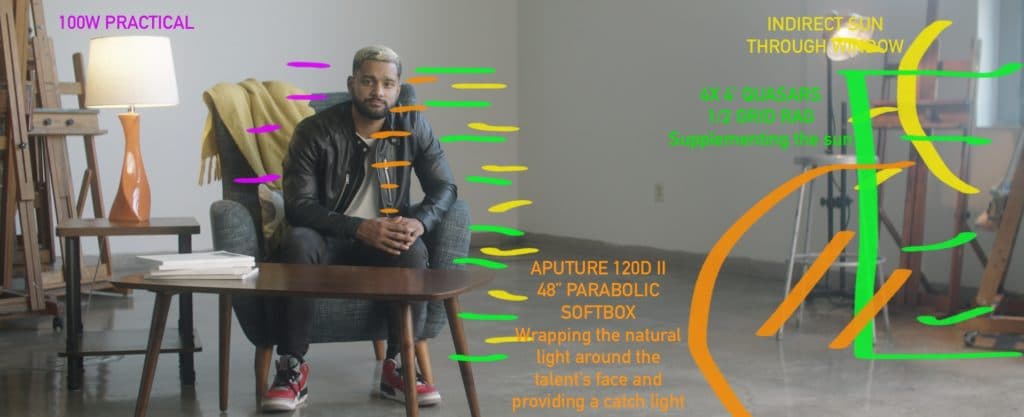
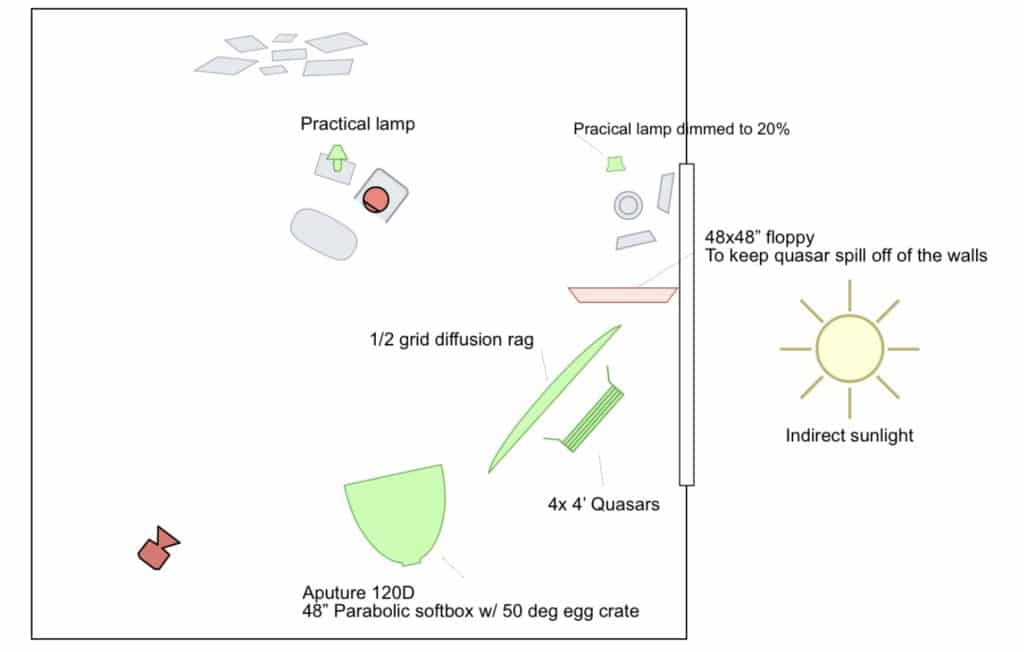
Example time! In this scene, we had a large window providing indirect sunlight, which created a nice, cinematic, contrasty look, but we weren’t getting enough exposure on the front side of our talent’s face. To bring up the levels, we placed four bicolor Quasar tubes to the right of the camera at about a 45 degree angle to our talent, and diffused them with a half grid cloth. This started to give some light wrap around the front right side of his face. We then stuck an Aputure 120DII with a 48″ parabolic softbox just to the left of the Quasar/grid cloth setup, completing the wrap around the front right side of his face and giving him a bit of an eye light.
2. Meet Negative Fill
No no, not Negative Phil, your moody neighbor. Negative fill creates contrast in your scene. This is especially helpful when shooting outdoors, and is one of your most useful tools in shaping sunlight.
Let’s go back to our scene with our two actors having a conversation, and put them outside in a field. Keeping in mind that we want to keep our key light (the sun) upstage, we place our negative fill on the camera side of Actor 1’s face (Figure 3). Just as a white bounce board will reflect sunlight back onto their face, a black cloth will absorb it and block ambient reflections from hitting that side of their face. Viola, you’ve created contrast!
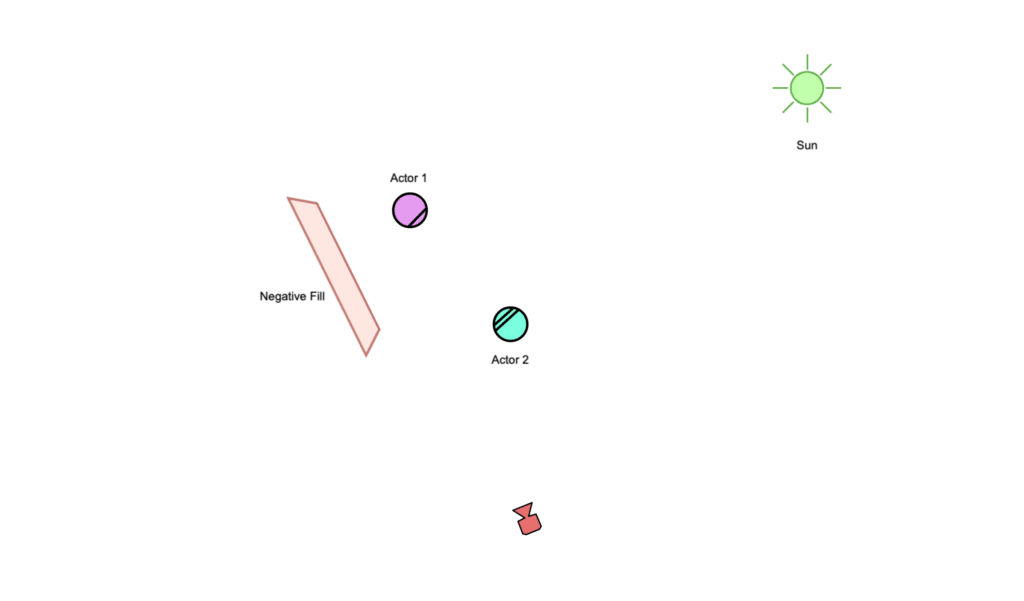
Figure 3
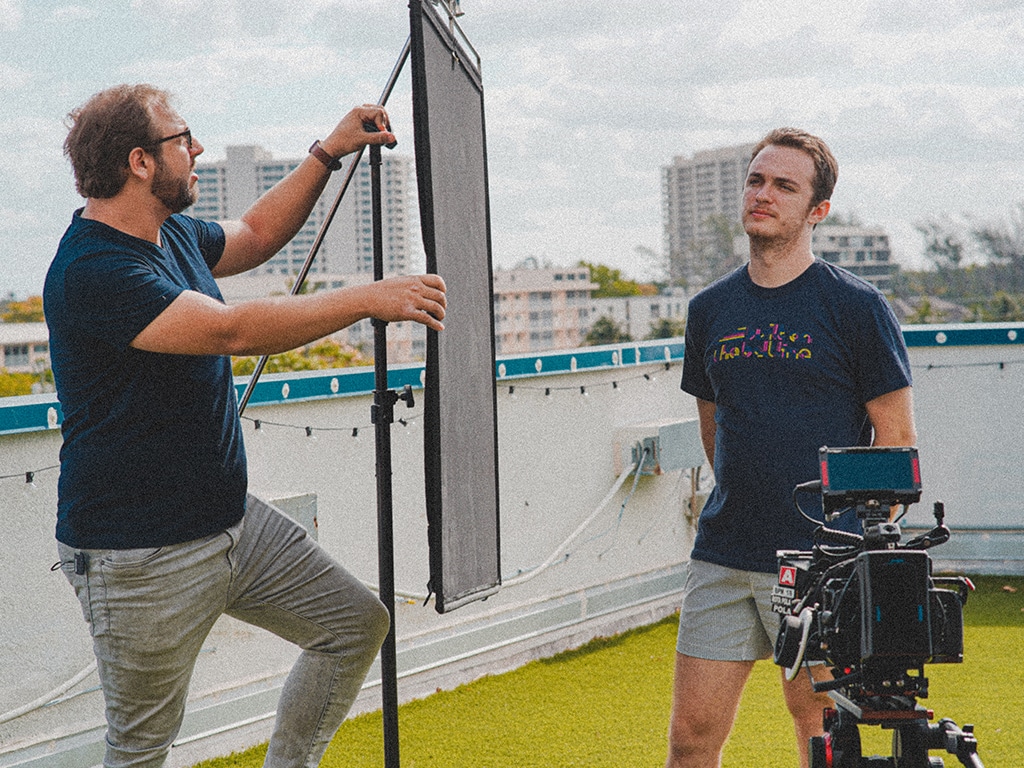
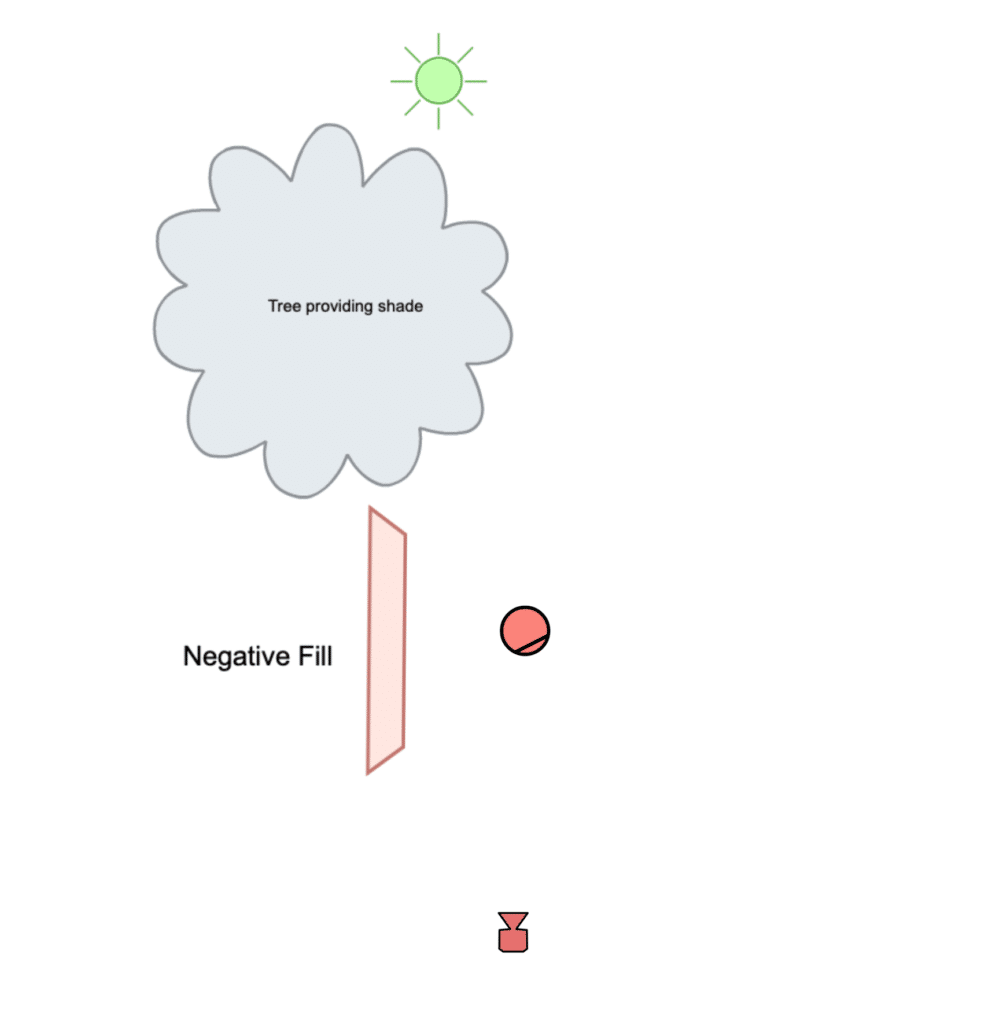
Here’s an example from one of our recent commercial shoots. We were out of direct sunlight in the shade of a tree, which made for very flat lighting. To up the contrast, we rigged a 48×48″ solid floppy just off the camera to the left, taking light off of the left side of our actor’s face.


3. Don’t make a sun sandwich, make a sun wrap
Let’s say you want Actor 1 to be 3/4 backlit by the sun in your scene, and you want to bring up the light level on their face so you can see their beautiful eyeballs. Well, that’s easy! Just throw a reflector board on the sun-opposite side of their face, right? Now you’ve achieved your exposure, but it looks like a second rogue sun has appeared in the sky, and the lighting on your actor looks flat and unnatural (Figure 4).
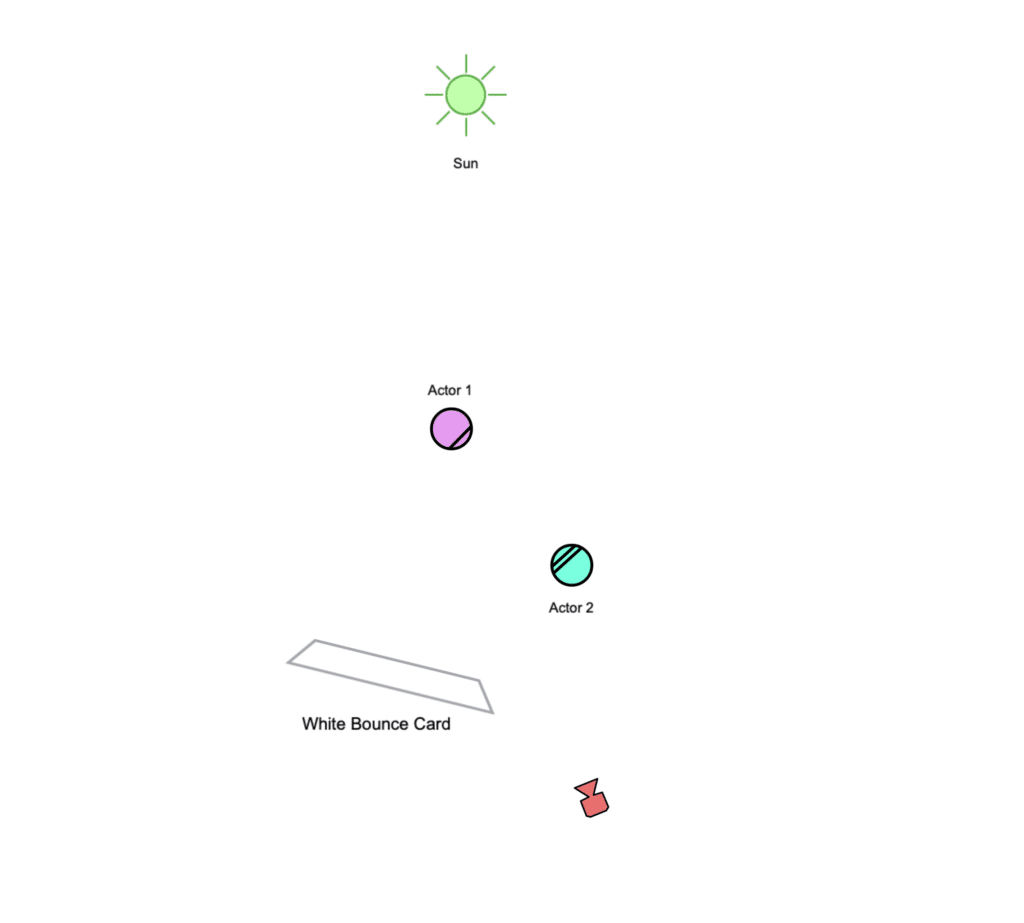
Figure 4
The better solution is to wrap the sunlight around the sun-side of the actor’s face. To do this, grab a second reflector board. Place one so that it’s reflecting light on the far side of the actor’s face so that you can just start to see an edge of that sunlight around the outline of their face. Take your second reflector and place it a little farther back, so that light is reflecting on the camera-opposite (upstage, remember?) side of their face. Now, you have a contrasty, pleasing, and more natural-looking image (Figure 5).
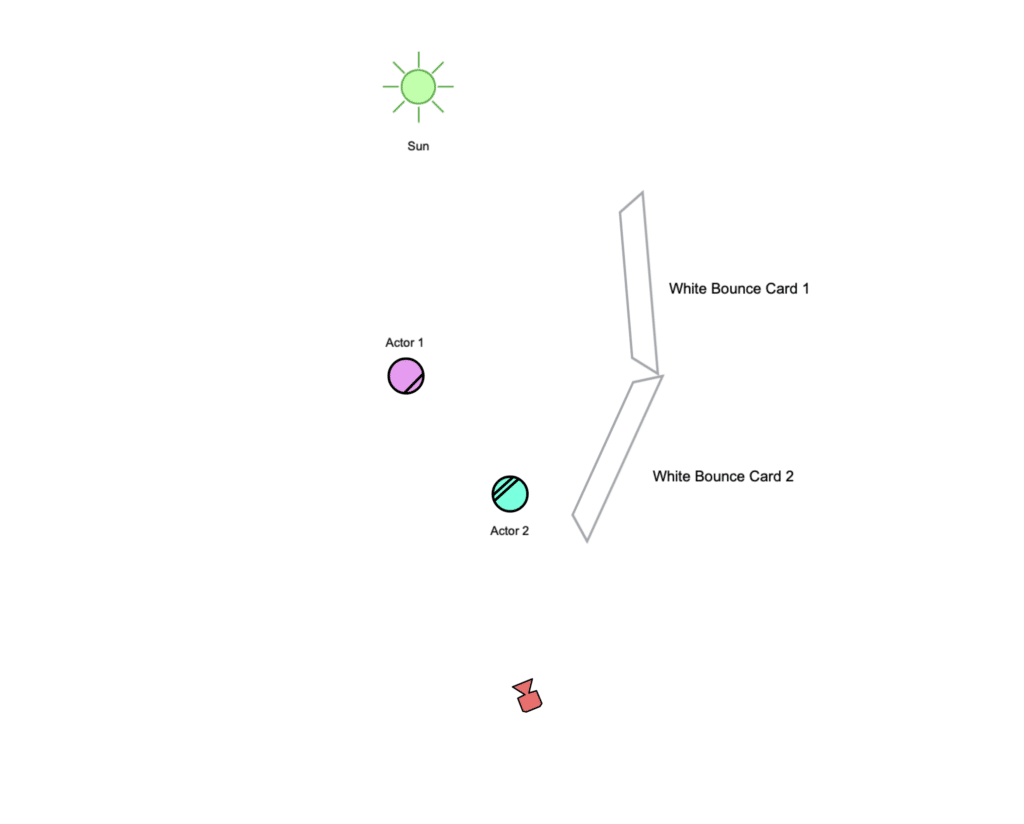
Figure 5
It should be noted that this doesn’t ALWAYS work out. Sometimes you have to compromise a little bit in the case that you need something specific in the background, and you can’t move exactly where you want to to get the perfect sun angle on your actor. Hey, if it were easy, everyone would do it!
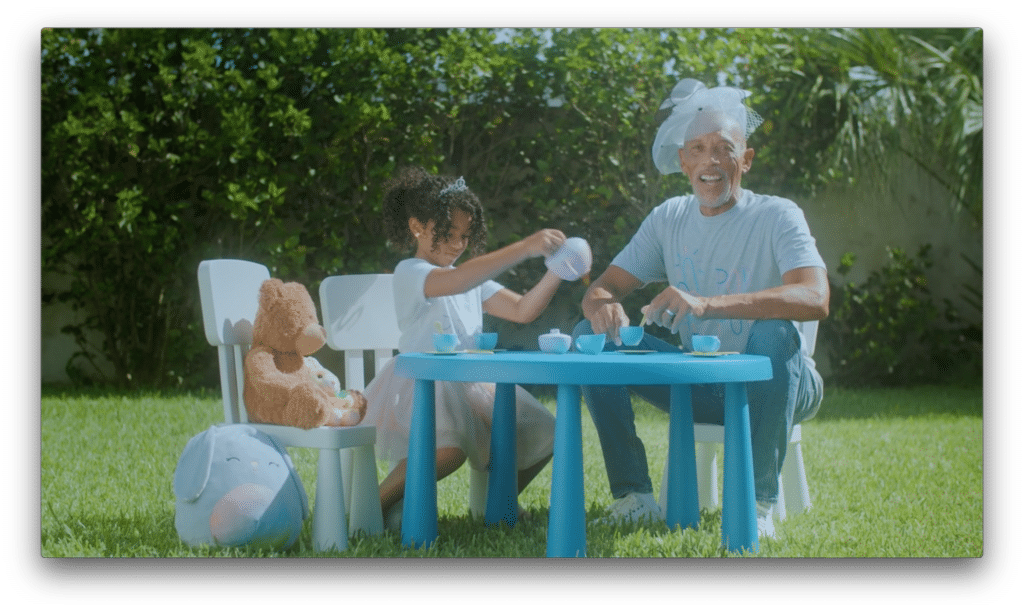
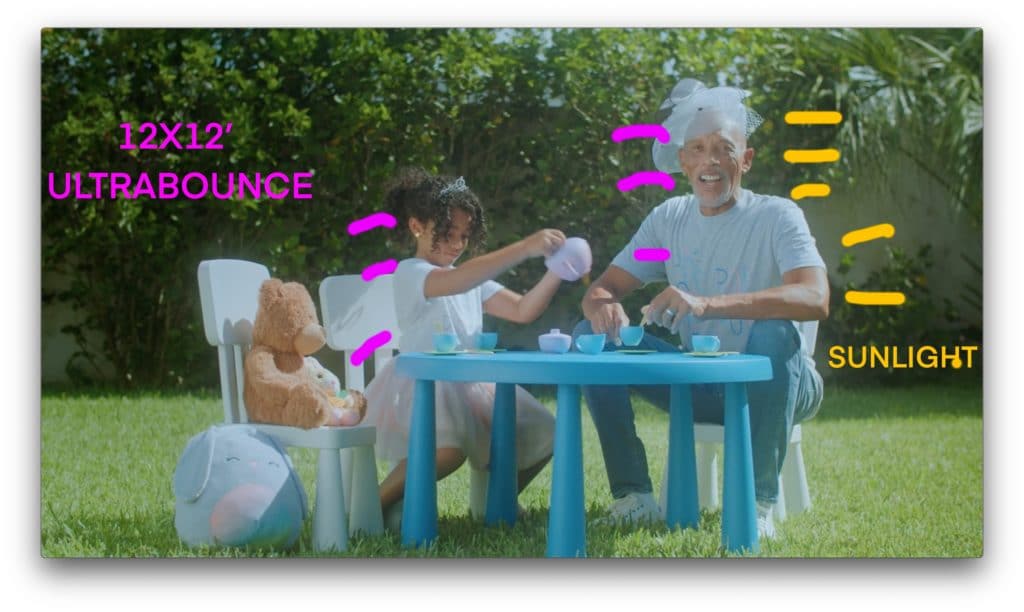
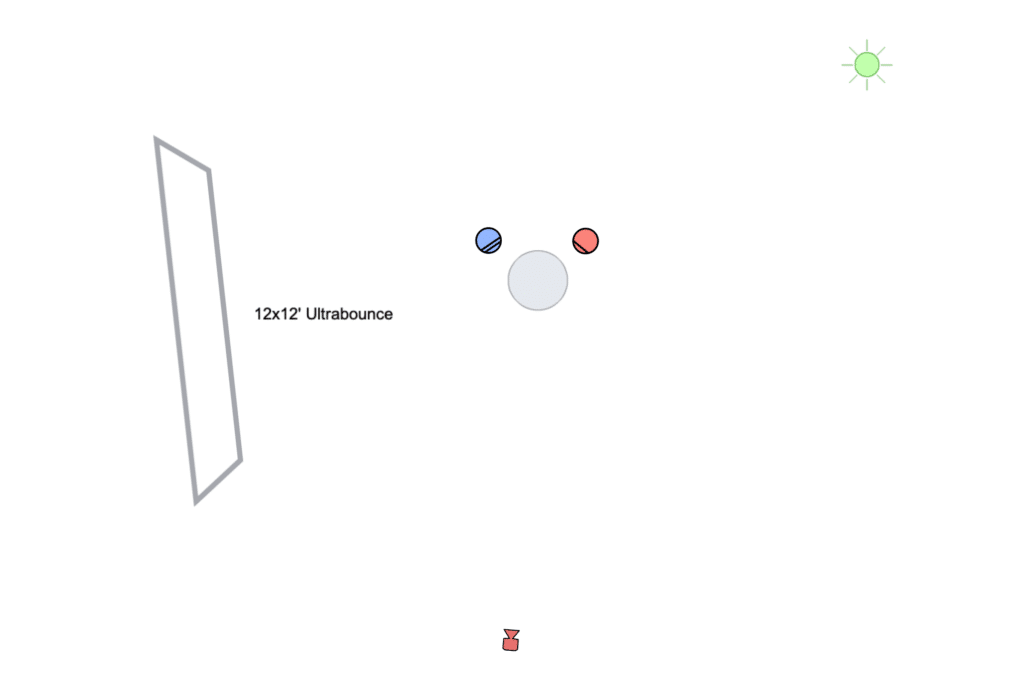
Below is another example from a software explainer video we produced last year. In this case, we had the bright late afternoon sun coming from behind the actor and to the right, and needed to see the greenery in the backyard. This kept us from being able to turn so that the sun was on the upstage side of the actor’s face. In order to create some shape on his face, I had my key grip rig up a 12×12′ Ultrabounce about 15 feet to the left of the camera, which reflected a subtle, soft light. While this technically created the dreaded “sun sandwich,” it doesn’t stand out in a wholly obvious way. It ultimately made our image match the look of the rest of the video.
“Wrapping” Up
Go and try these three tips out, and see how you do! You don’t even need to have a bunch of extra cash to spend on industry-quality flags and rags. Cheap 4’x8′ insulation foam boards feature white foam on one side and shiny silver on the other, and makes for an excellent 2-in-1 reflector. Some standard black blackout curtains work great for negative fill, and already have a built-in rod pocket or grommets that you can threat a c-stand arm through. If you want something a little larger and more versatile, a roll of flame-resistant duvetyne fabric goes for less than $50 on Adorama, and absorbs light like a sponge.
Now get out there and create some contrast!
